- Home
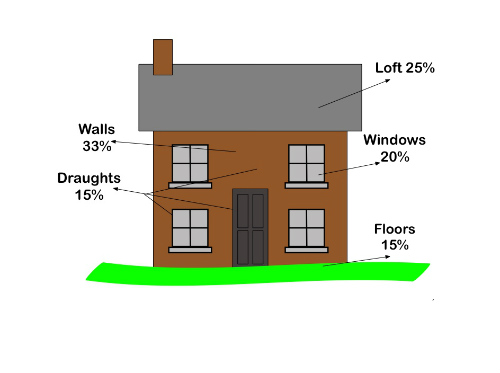
- Energy Efficient Upgrades for Existing Houses
- Underfloor Insulation
Adding Underfloor Insulation The Right Way.
Adding underfloor insulation to an older home with suspended timber floors is relatively easy to do. But as with so many things there is a right way and several wrong ways to do it.
The right way will reap many benefits and save you money on your heating bills.
But installing it incorrectly could damage your home and cost you more money in the long run!
Why do we have suspended timber floors?
In the past, (prior to damp proof membranes), floor boards would have been laid directly on top of the ground, but this inevitably led to damp and rot.
To get around this problem the timbers were raised off the ground and suspended timber floors were formed. That goy around the issue of the timber flooring sitting on the famp ground. But it created a void below the floor that then needed to be ventilated (to reduce the risk of condensation.
To ventilate the sub-floor, vents were added around the base of the walls to allow draughts to take away any water vapour build up before it can cause an issue.

Problems With Suspended Timber Floors:
Suspended timber floors actually work really well.
The draughts keep the timbers dry and avoids rot. However, when heating costs started to become a real issue we all decided that we wanted to make our homes as well insulated and draught free as possible.
We wanted to stop the draughts, so we blocked up the underfloor vents, but that caused condensation and rot to floor timbers.
We insulated the floor with fibreglass wool, but that absorbed the water vapour and then struggled to release it again. And once it was damp it became a much less efficient insulator.
So we need to try to create a floor insulation system that not only allows us to retain the ventilation to the under-floor area, but we also need to use an insulation material that can absorb and release water vapour without affecting its insulation properties and we need a way of reducing the passage of water vapour through the floor.
Why Add Underfloor Insulation?
- Because suspended timber floors are draughty:
By their very nature, suspended timber floors are draughty, they comprise simply of floor boards laid on top of timber floor joists. Sure, these draughts are often reduced slightly by underlay laid below timber, carpet or laminate floor finishes, but these will not stop the draughts completely as the edges are not typically taped to make them airtight and many of them are porus. - To Reduce Your Heating Bills:
Well installed underfloor insulation will mean your house will heat up quicker and lose heat slower - provided the underfloor insulation is correctly installed. - To Manage Vapour Transfer:
Correctly installed hygroscopic insulation, which absorbs and releases moisture easily, in an older property’s suspended timber floor will absorb some of the water vapour within the property during periods of high humidity (reducing the risk of condensation and mould on interior surfaces such as walls and ceilings) and release this water vapour slowly when the humidity levels are low.
A Few Useful Terms to Understand
- Hygroscopic Insulation - easily absorbs water vapour from the air during periods of high humidity and then releases it again slowly when humidity levels drop.
- Hydrophobic Insulation - resistant to the absorption and release of water vapour.
- Vapour Barrier - prevents water vapour passing through it (although no material is 100% impermeable to water vapour, vapour barriers are as close as you’ll get).
- Vapour Control Layer - designed to allow controlled amounts of the water vapour to pass through.
- Jointing Tape - used to provide an airtight seal at the joints of the tape. You can get different types of tape for sealing joints to different materials.
- Wind wash - is the movement of unconditioned air around or through buildings in such a way as to diminish or nullify the intended thermal performance of the home. In this instance it is where the ventilation in the sub-floor area draws heat out of loose unshielded insulation.
What Can Go Wrong With Underfloor Insulation?
- You can trap moisture from spills or interstitial condensation up against the timbers within hydrophobic insulation and in turn risk rotting the floor joists.
- You spend a lot of time and money installing underfloor insulation incorrectly, only to have it do very little because it has gaps around it, hugely negating the insulation properties of the floor!
- You suffer from wind wash where the air movement across the underside of the installed insulation draws some of the warm air out of the insulation, making it less efficient, (as insulation works by trapping warm air within it).
- You install the wrong type of insulation that absorbs water vapour but then struggles to release it. Or you don’t install the correct barrier products and sealing tapes.
If you’re going to go to the hassle and expense of lifting your floor boards and adding underfloor insulation, then surely it makes sense to do it correctly first time!
How have we Traditionally Added Insulation to Suspended Timber Floors?
Traditionally we've simply lifted the floor boards, laid a few lengths of chicken wire to support the insulation, laid the insulation between the floor joists and then refitted the floorboards.
Sounds simple, right...?
... Wrong!
As with any form of insulation in your home, it’ll only work effectively if:
- You use the correct type of insulation.
- Protect it from moisture and wind washing (where the air movement via the sub-floor vents draws warmth out of the exposed insulation)
- By making sure the installation is as airtight as possible.
Other Examples of Incorrect Ways to Insulate Suspended Timber Floors:
The next most common way I see insulation installed below suspended timber floors in older properties may also initially sound correct, but in reality it can lead to issues:
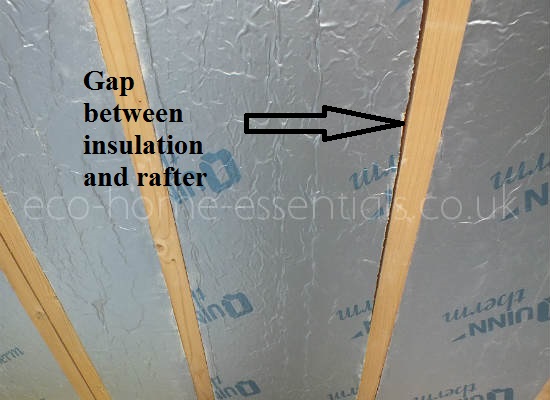
- Rigid Insulation boards (PIR Boards). These foil backed insulation sheets are cut and laid between the floor joists - the theory behind this sounds plausible, however floor joists in older properties don’t always run straight and so cutting the boards to fit tightly between the floor joists is a major pain, and if they’re not a tight fit the insulation won’t be efficient.
Plus the manufacturers say they won't absorb water, which we now know is not a good thing. But if you've ever been on a building site and seen the scraps of PIR board lying around and pick one up you'll know that they do absorb moisture and then really struggle to release it.
The next issue is they're really hard to fit tightly between the floor joists because floor joists never run true. So you end up with gaps which allows the heat to bypass the insulation and defeats the purpose of installing it. You could potentially seal the edges with spray foam, or with one of the many additional products that you can buy to create a compressible edge to the insulation boards, but that just increases the cost and adds additional hassle, and there's another problem;
The foil back to the insulation boards is a vapour barrier which prevents water vapour passing through. Meaning the water vapour can condense on the surface of the vapour barrier and cause problems.

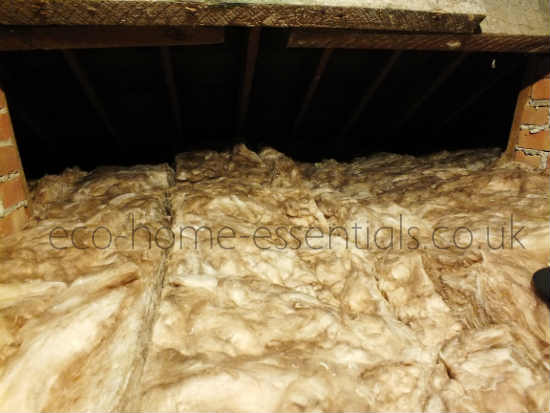
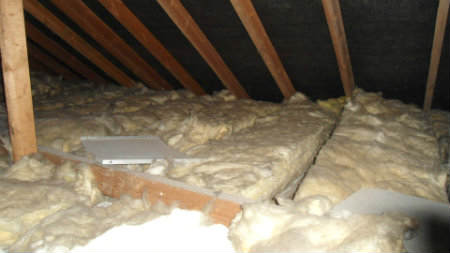
- Mineral wool or Fibreglass wool - As mentioned above is typically just packed between the floor joists and supported by chicken wire stapled to the bottom of the floor joists.
This can be packed in between the edges of the joists avoiding the issue with gaps but their structure is quite loose and can be badly affected by wind wash.
They’re also going to be open to the elements, so any spilled liquids from above and water vapour passing through the insulation will get trapped as we already know that man-made insulation absorbs moisture but struggles to release it thereby reducing it’s insulation properties significantly.
Note: While mineral fibre and fibreglass wool will absorb moisture, they will still allow the moisture to pass through them over time. Water spills from above will pass through and will compress it (I speak from personal experience, despite what the suppliers may tell you).
The Correct Way to Add Underfloor Insulation.
To insulate the suspended timber floors in your existing home you need to consider three things:
- Thermal performance.
- Moisture control.
- Air tightness.
So you need a system that will hold the heat well, allow water vapour (but not liquids) to be taken in when the humidity levels are high and released again once the humidity levels reduce and provide a barrier to make the installation air tight.
If you can achieve this you’ll avoid draughts and wind washing and get an insulation installation that performs well.
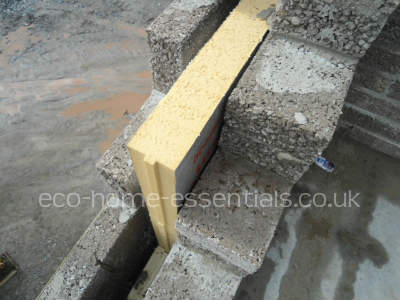
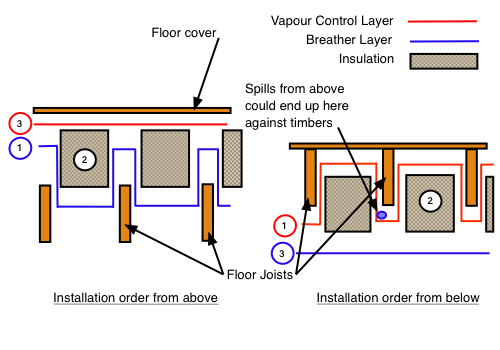
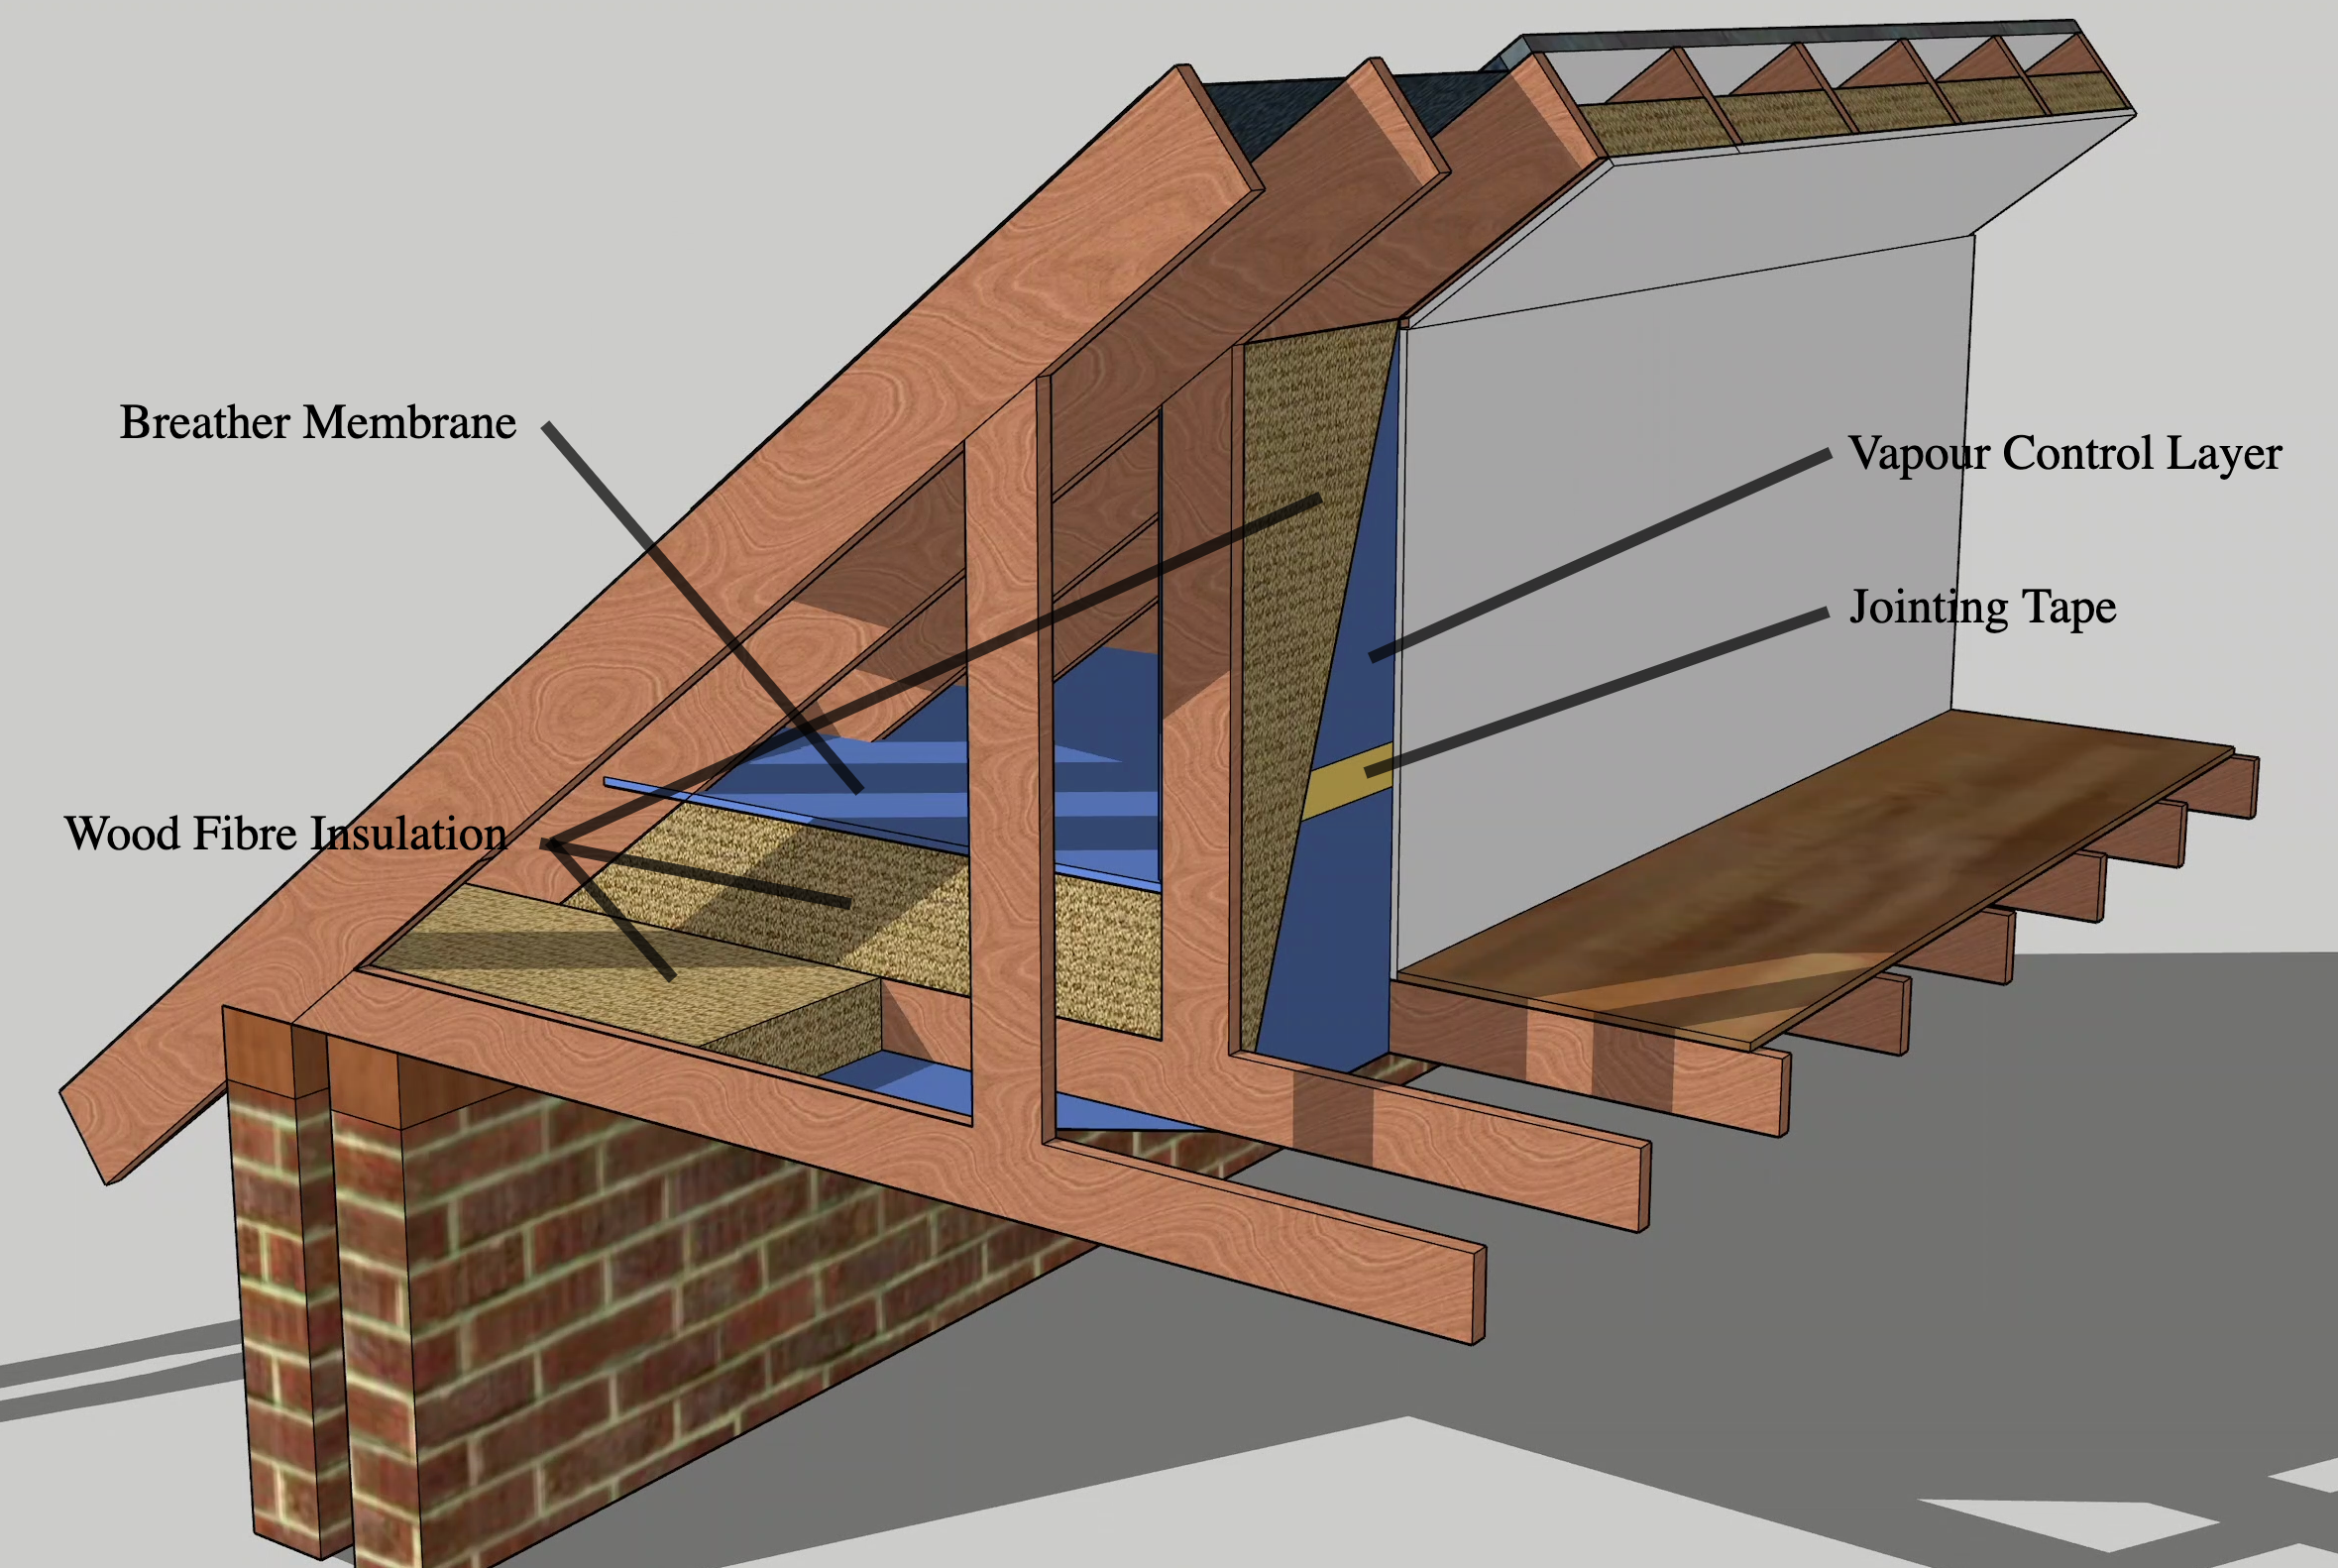
- The first step is to lift the floor boards to expose the floor joists and inspect and repair any defective joists etc. You could at this stage lay a vapour barrier on the clay surface below the floor (if you have clay/soil exposed) as this will reduce the risk of water vapour from the ground.
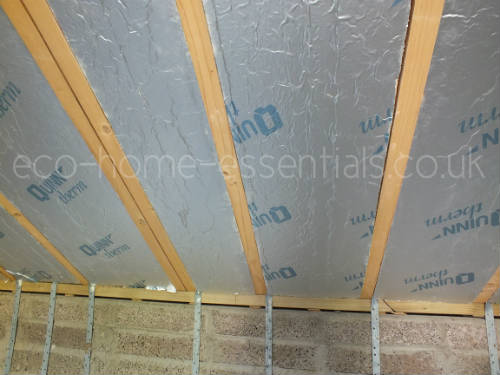
Next lay a breathable airtightness membrane over the joists forming wells for the insulation to be installed between the joists. This will stop wind washing and allow any residual water vapour to escape.

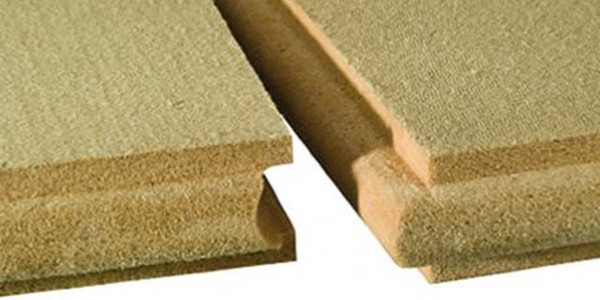
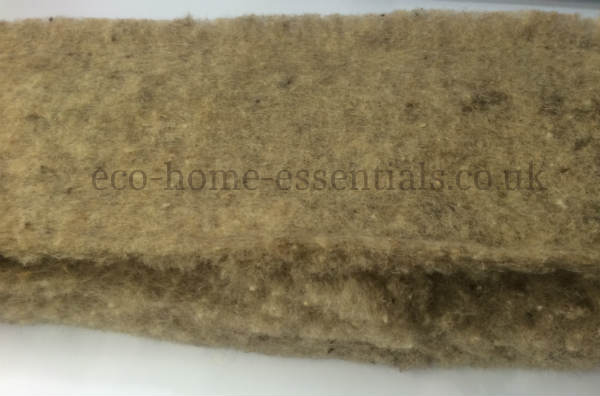
- Then install a high density (to avoid settlement over time) natural hygroscopic insulation product such as batts of sheep’s wool (but it will need to be treated to prevent moths and other insects eating it), wood fibre or Jute insulation (made from recycled cocoa and coffee bean bags) as these will regulate the water vapour by absorbing it when necessary and releasing is again slowly once humidity levels reduce.

- Finally you will need to lay a vapour control layer on top of the underfloor insulation (this slows the passage of water vapour through to the insulation but does not stop it like a vapour barrier would). All the time ensuring the correct overlaps and the correct taping of all edges Including the joint between the floor and the walls. Then you can relay your flooring.


Can Insulation be Added from Below?
This is a question I get asked a lot. So here's a link to an article discussing the pros and cons of adding underfloor insulation from below.
Checklist of Materials You'll Need:
The links below will take you to a partner site where you can buy the various products you'll need. These contain affiliate links for which I may make a small commission at no extra cost to you, should you make a purchase. Any commission made allows us to keep this site free for everyone to use.
Materials You May Need to Do This:

An Underfloor Insulation "Kit"
Passive House Systems have worked with us to put together an "Underfloor Insulation Kit", (this can also be used for fitting loft insulation), which includes the most common items you'll need to do the job correctly. They give you the sizes of each item, so you can figure out how much you'll need. Then it's as simple as clicking the number of each item you want. Plus it's all on one page so you don't have to hunt around their site to find everything.
Plus buying it this way will save you 10%.
The kit includes:
- A Vapour Control Layer (VCL) - installed on the warm side of the insulation
- A breather membrane - installed on the cold side of the insulation.
- Tape - to stick and join the vapour control layer (used for internal taping, so, jointing of vapour control layers, covering staples and sealing around services etc).

Your choice of natural insulation.
Other Materials You Might Need:

Tape to stick and join the breather layer (used for covering staples and sealing around services etc. that go through the breather layer. As this layer is located on the cold side of the insulation this is a waterproof tape).

1. Adhesive to stick either the VCL or the breather membrane to masonry walls - where the VCL or breather layer meets a masonry wall this is used, if you don't need to plaster over the finished joint, (it should be used in conjunction with a primer, see below).

1a. If however you want to plaster over the joint between the breather layer OR the VCL and a masonry wall, then you would use this tape - (it should be used in conjunction with a primer, see below).

NB. prior to sticking the VCL or the breather membrane to a masonry wall with either of the above two products you will need to use a spray on or paint on primer.
Conclusion:
As you can see from above it isn't really much more difficult to install underfloor insulation correctly. Provided you take your time and plan the installation of the breathable airtightness layer before starting (and ensure you leave a flap at the edges so that it can be taped to the walls).
Then lay the insulation so that there re no gaps and again when laying the vapour control layer you'll need to turn it up the wall at the edges and then taped.
If you can do this you'll have a well insulated, breathable and airtight floor.
Next step is to do the same to your loft insulation and walls.
You might also like the following articles, or click here for the full site index.
The Best Insulation for Homes
Choosing the best insulation for homes means knowing the all the advantages and disadvantages of the many different types of insulation available.
Cavity Wall Insulation Problems
Understanding cavity wall insulation problems is essential before you decide to retrofit cavity insulation.
Wood Fibre Insulation - Advantages and Disadvantages
What is wood fibre insulation and what are the reasons to use it or not use it.
How Insulation Works in Your Home.
Discover how insulation works in the walls and ceilings of your home. When you understand how it works you can choose the right insulation product!
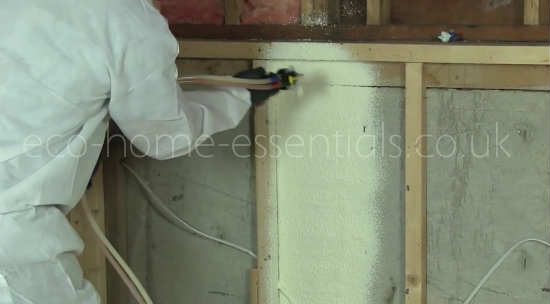
Is Spray Foam Insulation Any Good?
Is spray foam insulation really that much better than traditional insulations and what are the advantages and disadvantages?
Full Fill Cavity Insulation Advantages
Cavity insulation advantages are often overlooked due to bad press, but it's not all bad news: here are the facts
The Different Types of Wall Insulation
Understanding the different types of wall insulation is essential if you're to choose the right one that won't damage your home.
How to Install Insulation in Your Attic
How to install insulation in your attic the right way. Turns out most of us install it incorrectly, which can cause condensation and mould.
Problems With Cavity Wall Insulation
Understanding the problems with cavity wall insulation is essential before you consider retrofitting cavity insulation.
Rigid Foam Insulation
What's the best rigid foam insulation for your job, which performs best? What are the most popular types? And find out which is the most cost effective.
Best Home Insulation Materials!
Choosing the best home insulation is a bit of a minefield. So here's a list of the main products available with their R-values.
Are DIY spray foam insulation kits a viable option?
Is DIY spray foam insulation really something you can install yourself? Find out what the advantages and disadvantages are before committing yourself.
Insulating Floors from Below
Is insulating floors from below feasible? The simple answer is yes, but as ever, there are some things you'll need to consider before starting.
My top 5 best energy efficient home upgrades to reduce your bills
My best energy efficient home upgrades may surprise you. They're simple to implement and will reduce your bills straight away.
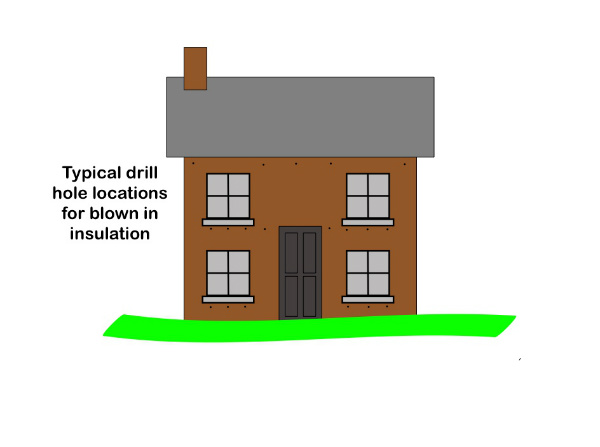
Blow in Insulation
Blow in insulation can make a big difference to your home, but be aware of the disadvantages as well as the advantages before making your final decision.
Is Internal Wall Insulation Worth Installing?
Why install internal wall insulation? Discover the pros and cons and how it can improve the health of you and your home while saving you money.
Exterior wall insulation - Is it Right for You?
Is exterior wall insulation right for your home? I list all the advantages and disadvantages of external insulation here.
Insulating an Attic Room
Insulating an attic room correctly will make a big difference and reduce the risk of damp, interstitial condensation and even rot.
Sheep Wool Insulation Natures Wonder Material
Is sheep wool insulation a genuine wonder material for insulating homes? Here's everything you need to know.
Is Denim Insulation Any Good?
Is denim insulation is a good choice for your home? Here's everything you need to know before making your decision.
Insulating an Old House - The Right Way
Insulating an old house sounds easy but if done wrong you could cause damage to your home.


Recent Articles
-
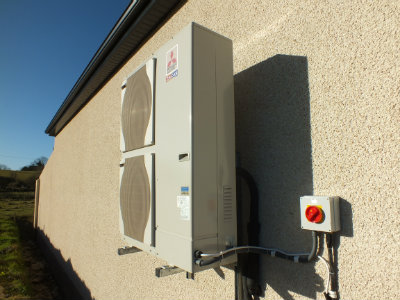
Air Source Heat Pump Efficiency
Oct 16, 24 08:33 AM
 Understanding air source heat pump efficiency is essential if you want a system that is cheap to run, these pointers should help you create an efficient system.
 -
How to Increase Your EPC Rating
Apr 24, 24 11:33 AM
 Learning how to increase your EPC rating is simpler and probably less expensive than you think- find out how here.

New! Comments
Have your say about what you just read! Leave me a comment in the box below.