- Home
- Energy Efficient Upgrades for Existing Houses
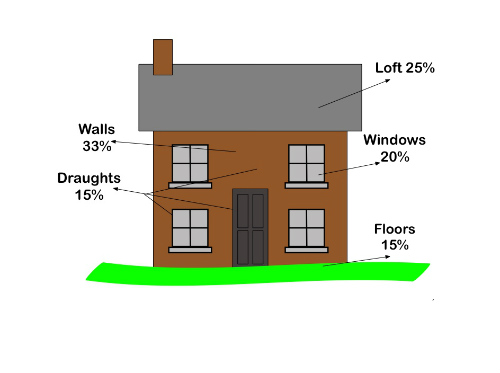
- How to Insulate Your Loft
How to Install Insulation in Your Attic Correctly.
I get asked how to install insulation a lot, so here I'll run through the correct way to install loft insulation to help you reduce the risk of interstitial condensation, mould and allow your insulation material to perform to its best ability.
Most Common Issues.
As a residential surveyor I look at a lot of houses and I could count on one hand (and still have a few fingers to spare) the number of existing and older houses that, in my opinion, have had their loft insulation installed the best possible way.
And, if you're a builder or installer, before you start screaming at your computer, this is my opinion and it will probably differ from yours. There are no definitive "rules" that state how to install your loft insulation, but the "traditional" way will likely lead to issues.
If you're renovating, Building control will talk about meeting the minimum energy efficiency values set out in the Approved Documents. But they won’t tell you how to install insulation in your loft and they won’t go into the benefits of vapour control layers or air tightness issues in existing and older properties.

Useful Terms to Understand
Hydrophobic Insulation - doesn’t absorb and release water vapour readily e.g man made insulation such as fibreglass wool or mineral fibre etc.
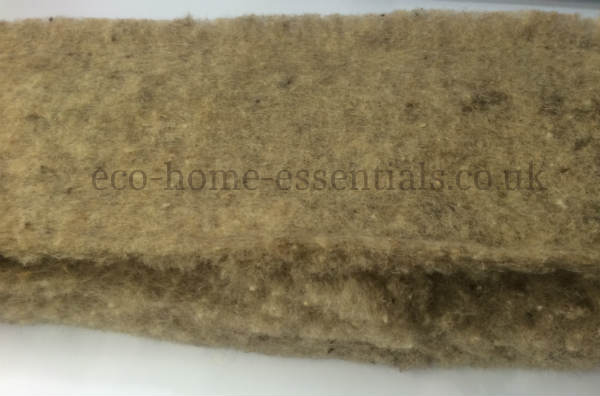
Hygroscopic Insulation - DOES absorb and release water vapour readily. So it will take in water vapour during periods of high humidity and release it during periods of low humidity. Examples include; sheep’s wool (best to choose sheep wool that has been treated to prevent moths and other insects eating it), wood fibre or Jute insulation (made from recycled cocoa and coffee bean bags)
Wind wash - where the air moving over the top of the insulation from your roof ventilation (and if your loft insulation has been increased Building Control says it should also be vented) reduces the thermal efficiency of the insulation by drawing heat out of it.
The Traditional Way to Install Loft Insulation
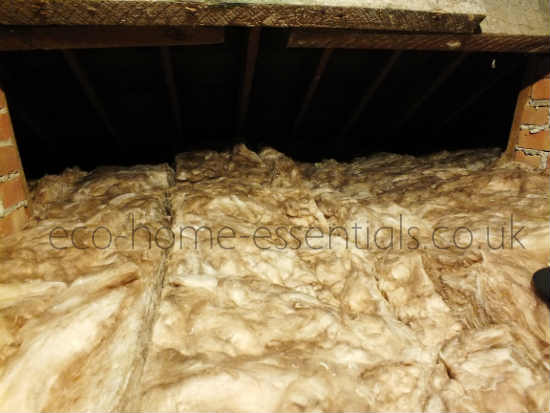
Traditionally the majority of older houses will have very little if any insulation in the loft area. But many people have either had someone come in to insulate their loft or they’ve had a go at it themselves.
This typically involves clearing the loft of any debris or stored items and rolling out 100mm thick layers of fibreglass or mineral fibre insulation between the joists (there are other types of insulation that can be used but the majority I see are either mineral fibre or fibreglass). Then a second layer of 200mm thick insulation is rolled out perpendicular to the first layer to minimise the risk of gaps between rolls.
So far so good? I’m guessing this all sounds familiar? If not have a look at the images below.
Is this the right way to install insulation?
The short answer is no! While this method does include some of the correct steps it also misses out a few very important steps.


The Issues With the Traditional Method
- There is no protection layer on top of the insulation to prevent “wind wash”.
- There is no vapour control layer underneath the insulation to prevent water vapour getting into the insulation where it can condense by way of interstitial condensation and reduce the efficiency of the loft insulation and potentially hold moisture against roof timbers where it could cause rot.
- Typically recessed lighting doesn’t have fire hoods installed, which will help reduce the risk of fire and can also act as a vapour control layer provided they’re installed correctly.
- NB. if you happen to have any polystyrene insulation in your loft area you should never allow this to come into contact with PVC wiring within in your loft, or anywhere else for that matter as the PVC sheath on the wiring will become brittle and could cause a fire.
How to Install Insulation in You Loft Correctly.
By installing or upgrading the loft insulation in your home you’re trying to make your home retain it’s heat for as long as possible. So it makes sense to try and protect that insulation from wind wash and from water vapour from within your home. If you can do that, your insulation will perform better and you’ll reduce the risk of condensation issues, such as mould, damp and rot.
Think of it like putting a breathable waterproof coat over your wool sweater before going out for a walk in the rain. Without the waterproof coat the wool sweater would absorb a lot of moisture before you start to feel wet but if you can stop the moisture getting into the wool in the first place you can stay outside indefinitely.
How to Install Insulation Step 1.
Clear your loft area - if you have any insulation in your loft I’d suggest removing it, then clean the loft area, a vacuum will lift any small pieces of insulation and dust that could cause sealing tapes (mentioned in a later step) from sticking.
How to Install Insulation Step 2.
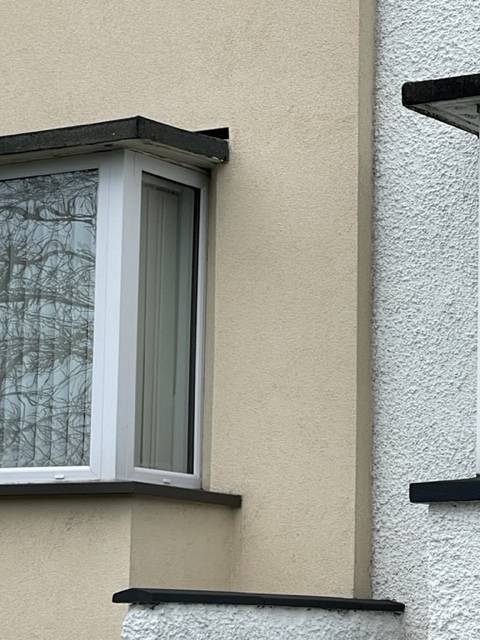
If you have eaves vents you will need to ensure that you do NOT block these and you may need to either reduce the thickness of the insulation as it gets to the eaves or preferably install eaves ventilation spacers or eaves vent protectors which will maintain the ventilation space (see the last image on this page). You can buy these designed for refurbishment projects that fit between the rafters.
Any recessed lights going through the ceiling must be covered and sealed within airtight and fireproof enclosures such as fire hoods (if not the light fitting could overheat and cause a fire and water vapour can also get through the light fitting). Traditionally electricians just pull the insulation back from around the recessed fittings leaving sections of the loft uninsulated. You should also replace standard bulbs with LED bulbs as these will not get as hot while in operation, be a lot cheaper to run and last linger.
Services such as wires and pipes that go through the ceiling will also need to be sealed airtight.
How to Install Insulation Step 3.
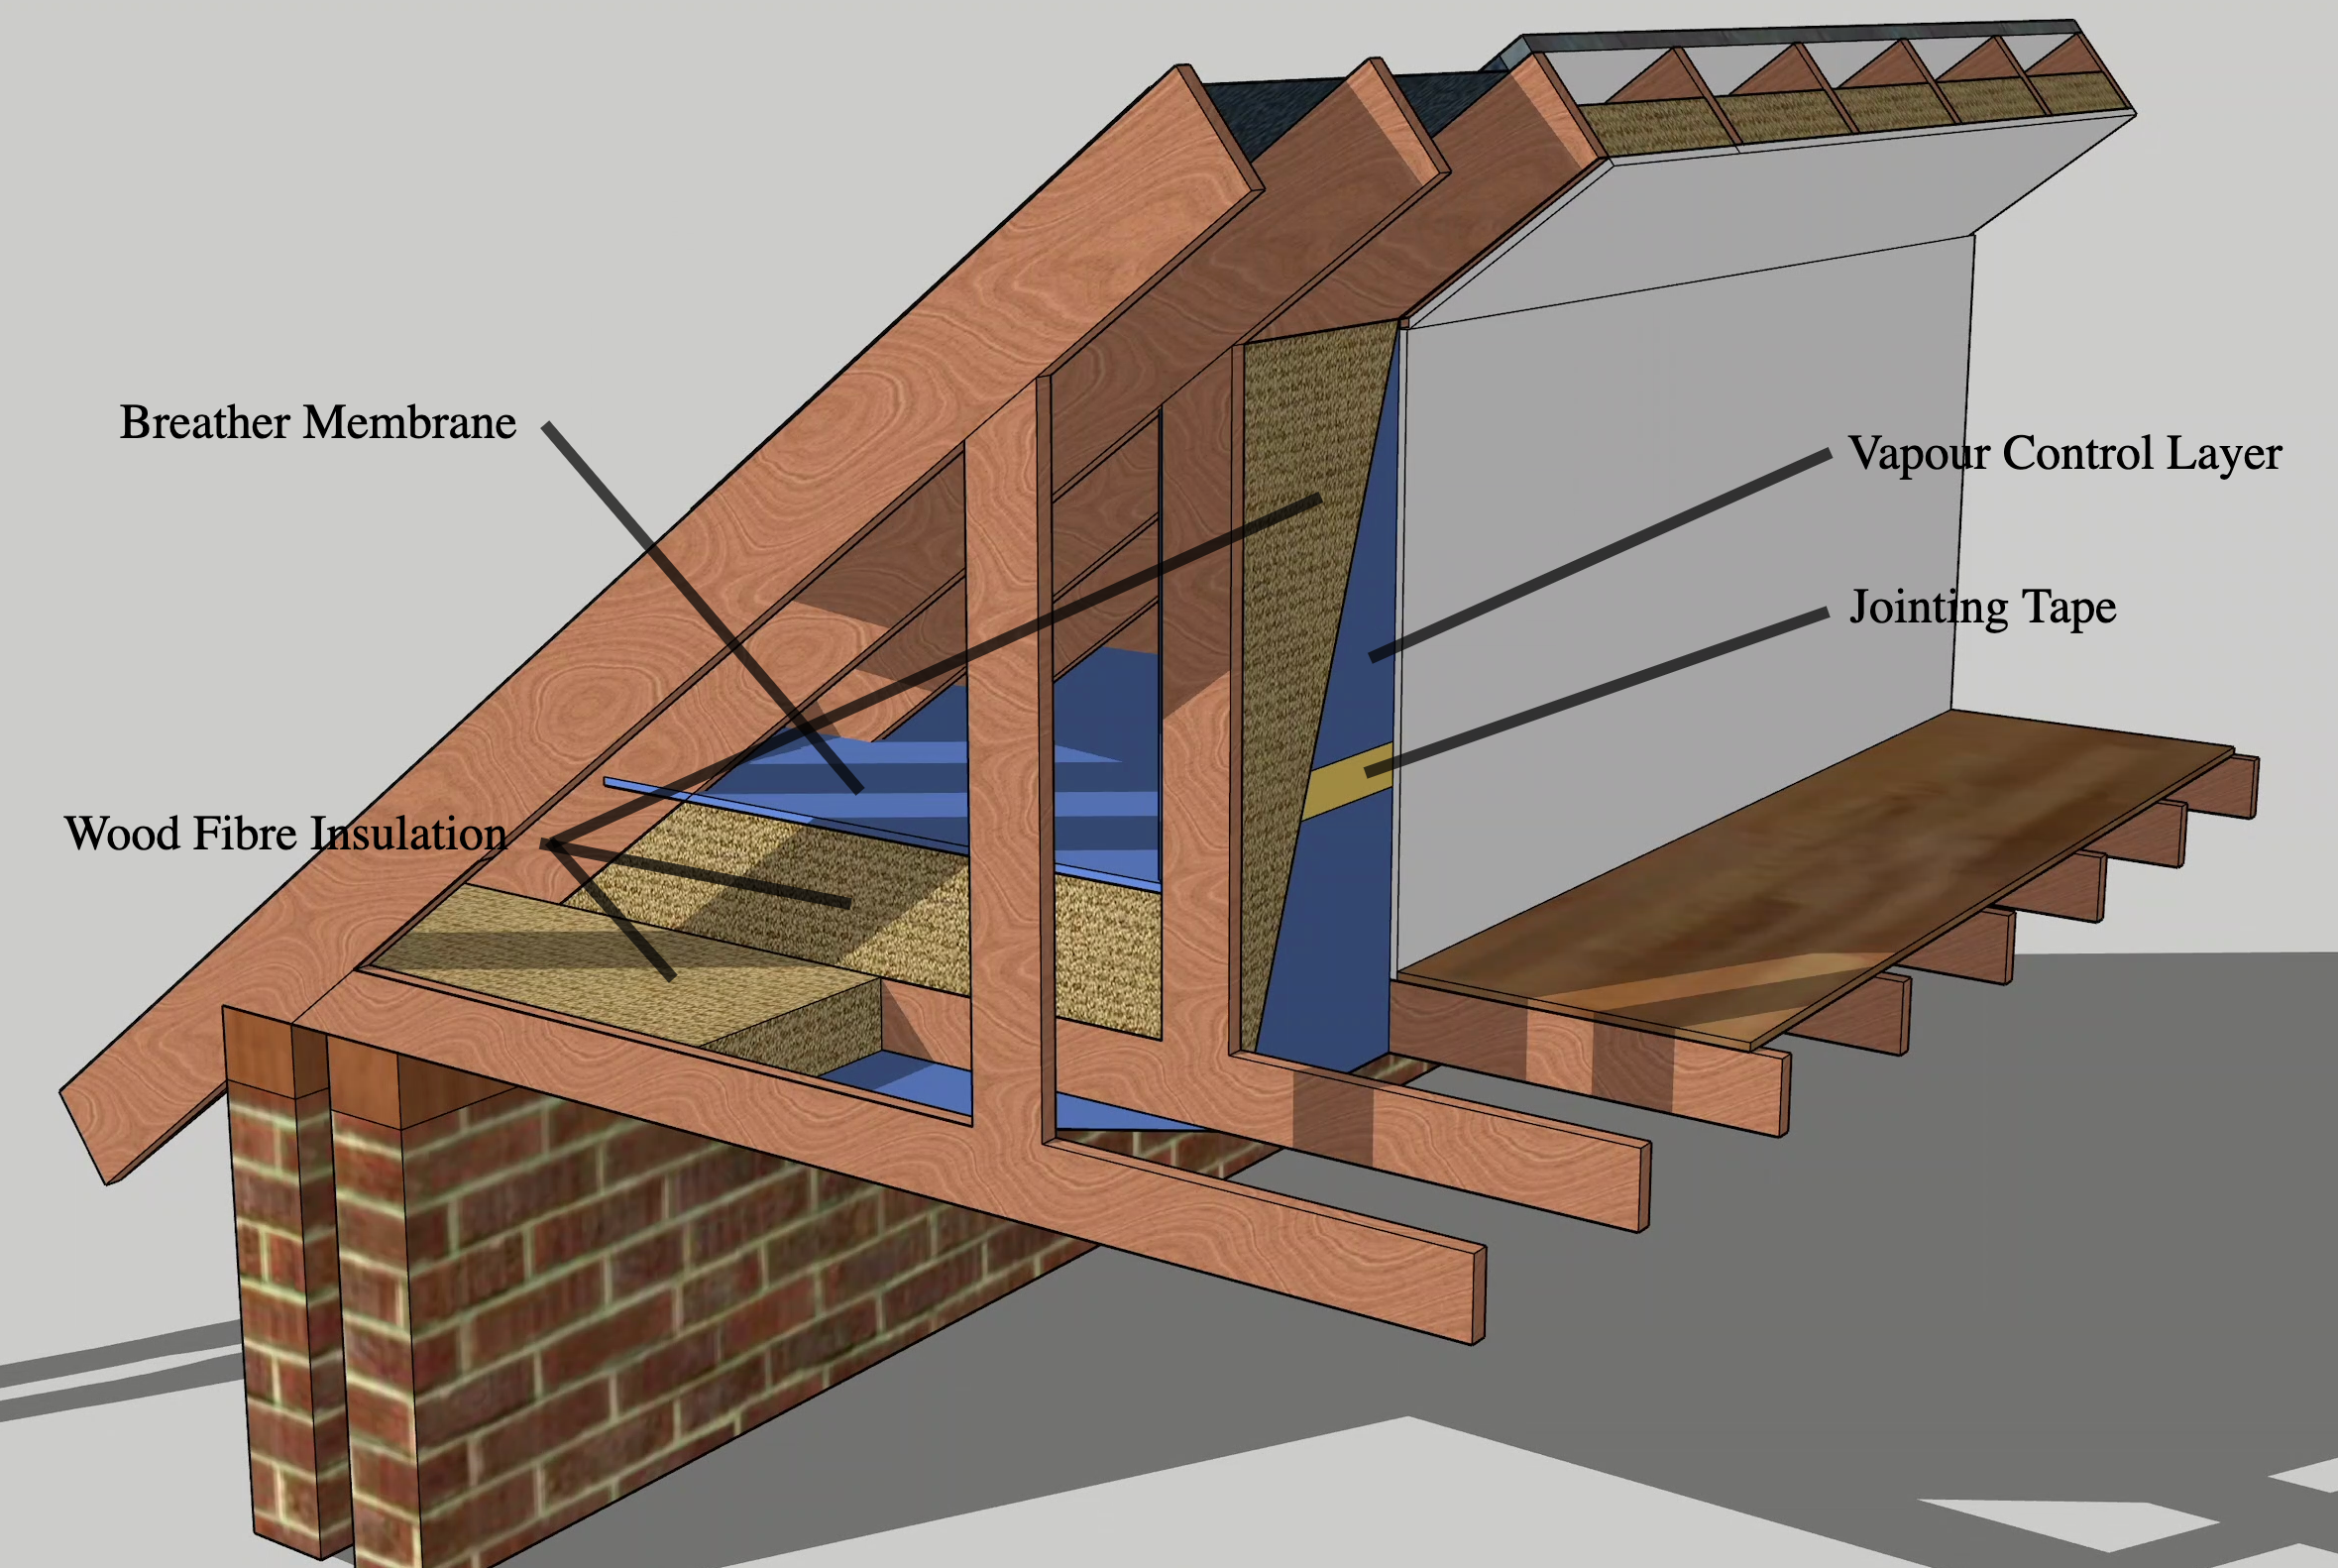
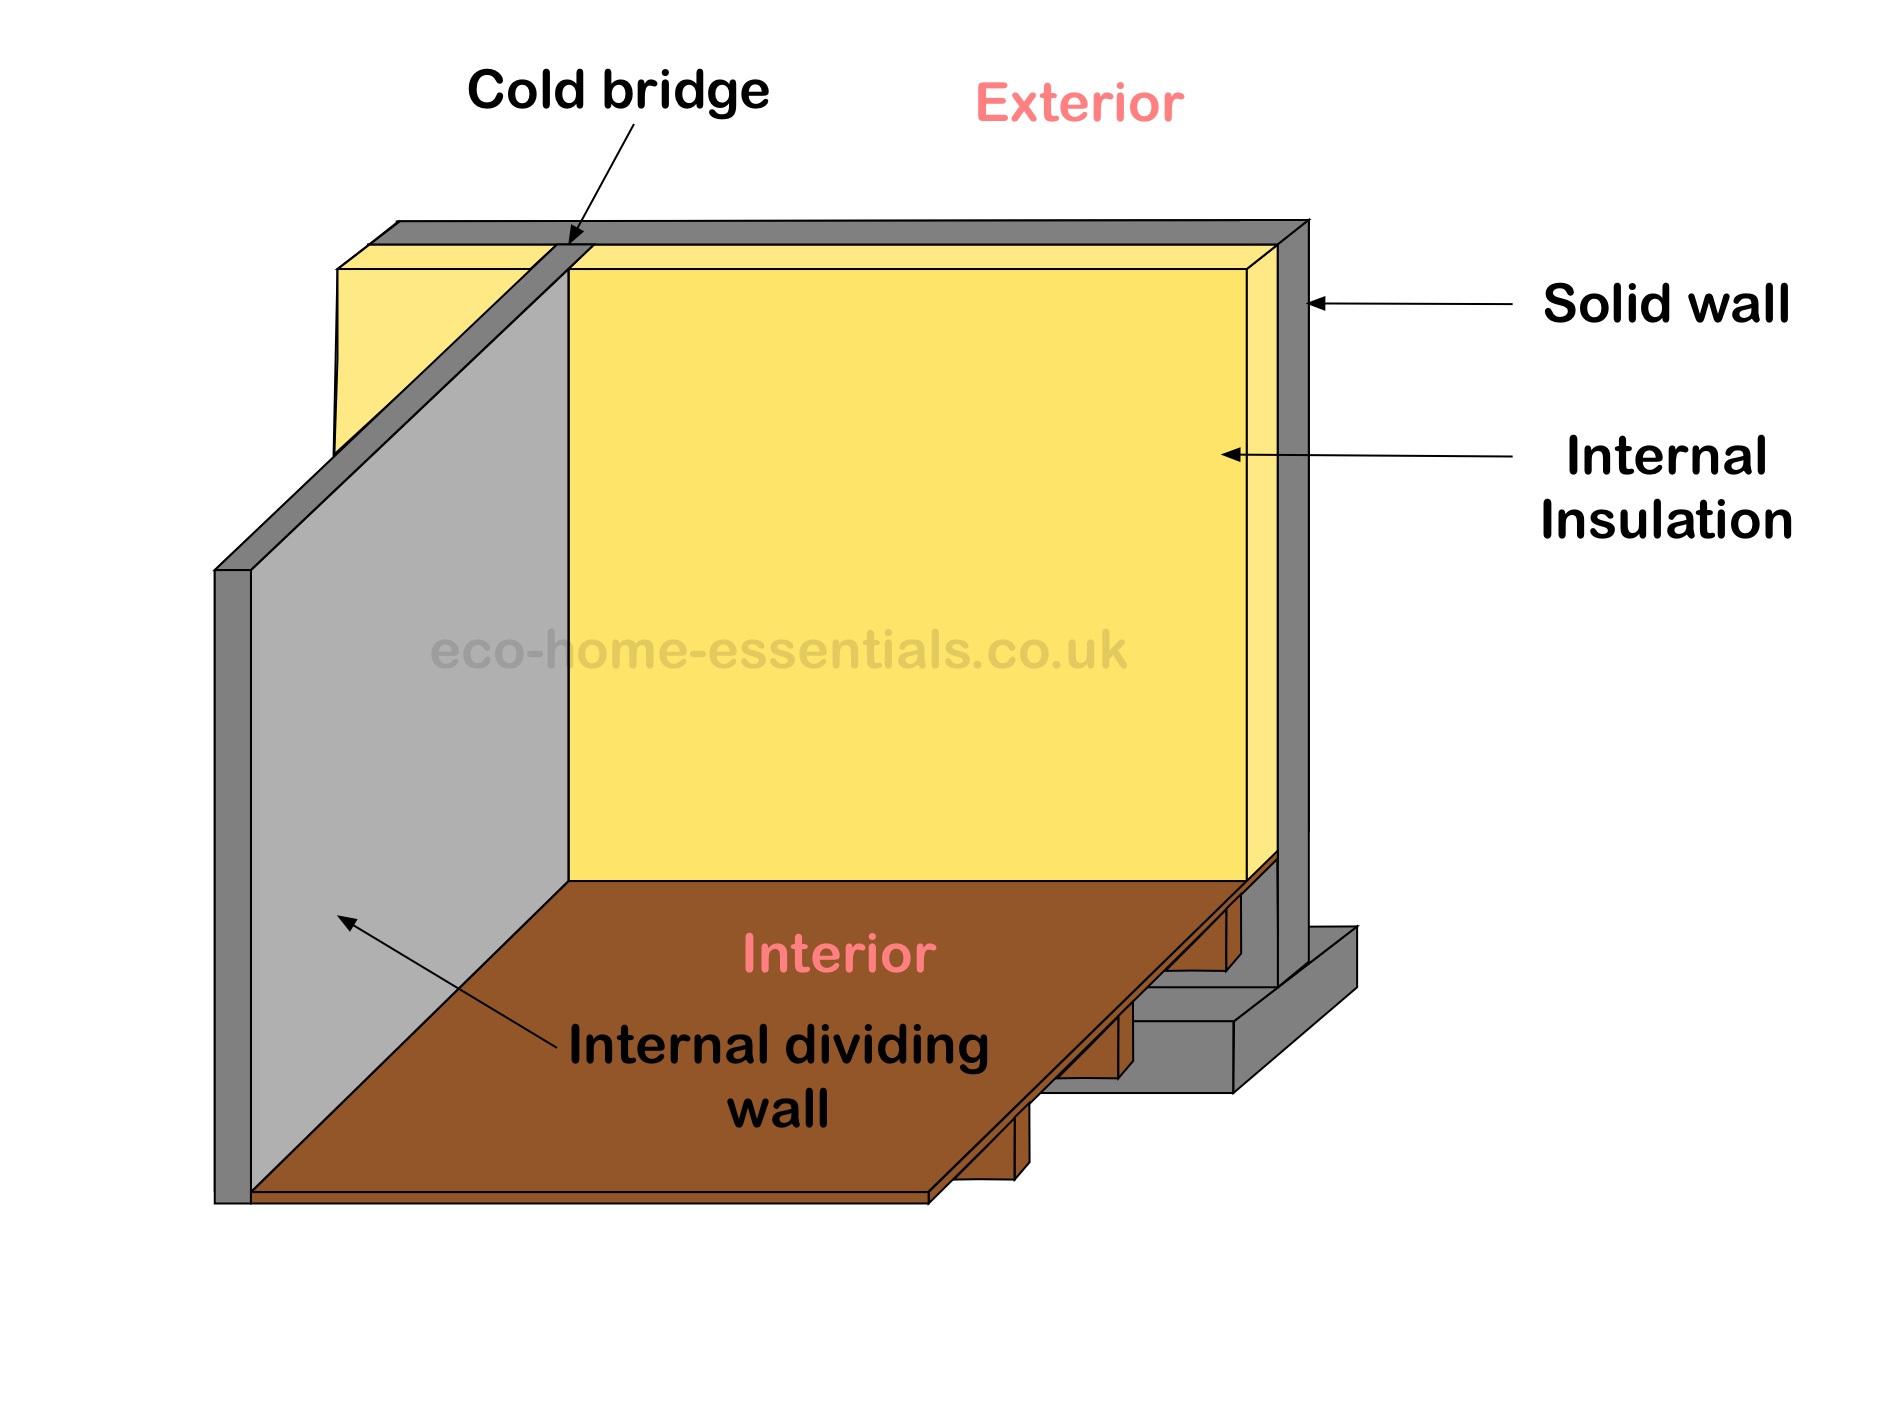
Lay a vapour control layer as this will let a controlled amount of water vapour through to the insulation in cold weather and back again in warmer weather. If you can lay this in one piece so much the better but if you have to joint it you’ll have to use a good quality jointing tape (not gaffer tape or parcel tape).
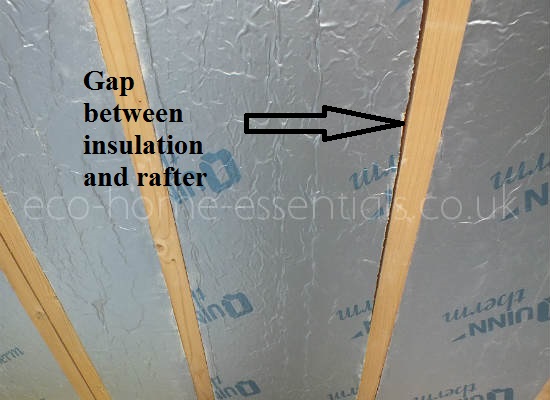
Leave enough barrier at the edges so that it can be sealed to any vapour barrier that may be in the walls, or if no vapour barrier has been installed in the walls then it will need to be sealed to the wall surface within the roof void. This will provide a proper airtight seal. When laying the vapour control layer it should go right down into the gaps between the joists to form pockets into which the first layer of insulation is laid (see the final image on this page) and the insulation should be tight to the joists with no gaps.
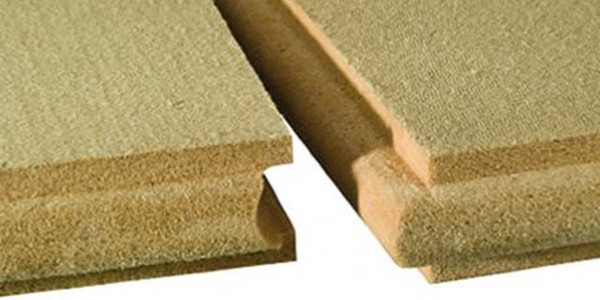
Using this method will allow the structure to dry out and reduce the risk of damp, condensation and mould within the structure of your home. While this can be used with traditional hydrophobic (man made insulation) I recommend going with a natural hygroscopic insulation such as wood fibre as the wood fibre will absorb and release water vapour easily without affecting its efficiency, whereas the manmade insulation will struggle to release this water vapour.
How to Install Insulation Step 4.
Lay your insulation (high density batts are preferable as they resist sagging over time). Lay 100mm between the joists (the horizontal timbers on the floor of your loft area) and then lay another layer of 200mm thickness (you could add 300mm if you prefer) perpendicular to the first layer as this will reduce the risk of gaps in the insulation.
If you have a water tank that sits on or close to the joists then you should NOT insulate below the water tank as this will help reduce the risk of freezing. You should also insulate the sides and top of the water tank and install a good fitting lid. If your water tank is elevated above the joists then you should insulate below the water tank. Pipework in the loft area will also need to be well insulated.
How to Install Insulation Step 5.
If you are going to install a storage area or a walkway to access a water tank etc. you should install additional joists or stilts to raise the finished floor level so when you floor these sections they do not compress the insulation and form a tight seal with no gaps.
How to Install Insulation Step 6.
Lay the air tightness layer or breather membrane on the top of the insulation and seal all edges and joints as this will reduce the risk of wind wash.

How to Install Insulation Step 7.
Stand back and admire a job well done.
The links below will take you to a partner site where you can buy the various products you'll need. These contain affiliate links for which I may make a small commission at no extra cost to you, should you make a purchase. Any commission made allows us to keep this site free for everyone to use.
Materials You May Need to Do This:

An Underfloor Insulation "Kit"
Passive House Systems have worked with us to put together an "Underfloor Insulation Kit", (this can also be used for fitting loft insulation), which includes the most common items you'll need to do the job correctly. They give you the sizes of each item, so you can figure out how much you'll need. Then it's as simple as clicking the number of each item you want. Plus it's all on one page so you don't have to hunt around their site to find everything.
Plus buying it this way will save you 10%.
The kit includes:
- A Vapour Control Layer (VCL) - installed on the warm side of the insulation
- A breather membrane - installed on the cold side of the insulation.
- Tape - to stick and join the vapour control layer (used for internal taping, so, jointing of vapour control layers, covering staples and sealing around services etc).

Your choice of natural insulation.
Other Materials You Might Need:

Tape to stick and join the breather layer (used for covering staples and sealing around services etc. that go through the breather layer. As this layer is located on the cold side of the insulation this is a waterproof tape).

1. Adhesive to stick either the VCL or the breather membrane to masonry walls - where the VCL or breather layer meets a masonry wall this is used, if you don't need to plaster over the finished joint, (it should be used in conjunction with a primer, see below).

1a. If however you want to plaster over the joint between the breather layer OR the VCL and a masonry wall, then you would use this tape - (it should be used in conjunction with a primer, see below).

NB. prior to sticking the VCL or the breather membrane to a masonry wall with either of the above two products you will need to use a spray on or paint on primer.
So now that you know how to install insulation in your loft there is nothing stopping you from making your home warmer, cheaper to heat and a more pleasant place to be. The same principle can now be applied to your suspended timber floor and here is an article on adding cavity wall insulation and the issues connected with such insulation.
You might also like the following articles, or click here for the full site index.
Sheep Wool Insulation Natures Wonder Material
Is sheep wool insulation a genuine wonder material for insulating homes? Here's everything you need to know.
Rigid Foam Insulation
What's the best rigid foam insulation for your job, which performs best? What are the most popular types? And find out which is the most cost effective.
My top 5 best energy efficient home upgrades to reduce your bills
My best energy efficient home upgrades may surprise you. They're simple to implement and will reduce your bills straight away.
Best Home Insulation Materials!
Choosing the best home insulation is a bit of a minefield. So here's a list of the main products available with their R-values.
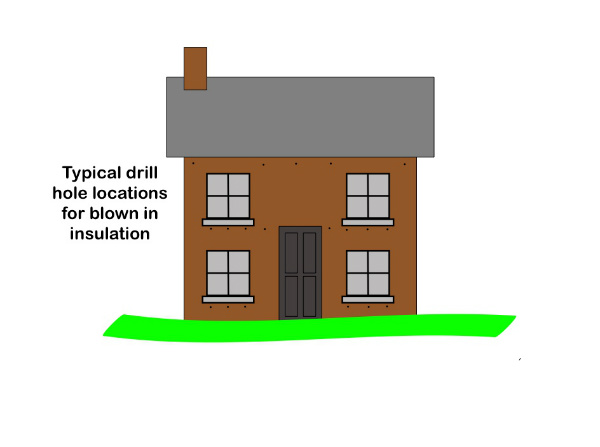
Blow in Insulation
Blow in insulation can make a big difference to your home, but be aware of the disadvantages as well as the advantages before making your final decision.
Insulating an Attic Room
Insulating an attic room correctly will make a big difference and reduce the risk of damp, interstitial condensation and even rot.
The Different Types of Wall Insulation
Understanding the different types of wall insulation is essential if you're to choose the right one that won't damage your home.
Wood Fibre Insulation - Advantages and Disadvantages
What is wood fibre insulation and what are the reasons to use it or not use it.
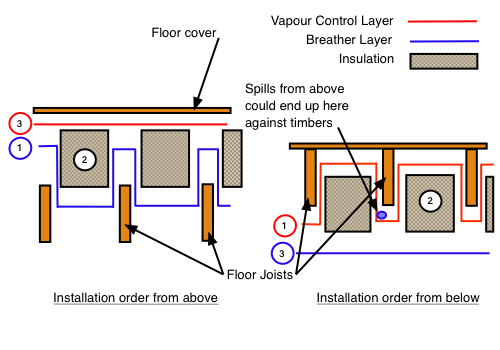
Insulating Floors from Below
Is insulating floors from below feasible? The simple answer is yes, but as ever, there are some things you'll need to consider before starting.
Full Fill Cavity Insulation Advantages
Cavity insulation advantages are often overlooked due to bad press, but it's not all bad news: here are the facts
Cavity Wall Insulation Problems
Understanding cavity wall insulation problems is essential before you decide to retrofit cavity insulation.
Exterior wall insulation - Is it Right for You?
Is exterior wall insulation right for your home? I list all the advantages and disadvantages of external insulation here.
The Best Insulation for Homes
Choosing the best insulation for homes means knowing the all the advantages and disadvantages of the many different types of insulation available.
How Insulation Works in Your Home.
Discover how insulation works in the walls and ceilings of your home. When you understand how it works you can choose the right insulation product!
Are DIY spray foam insulation kits a viable option?
Is DIY spray foam insulation really something you can install yourself? Find out what the advantages and disadvantages are before committing yourself.
Is Denim Insulation Any Good?
Is denim insulation is a good choice for your home? Here's everything you need to know before making your decision.
Adding Underfloor Insulation to Existing and Older Properties
Adding Underfloor Insulation easy to do wrong but thankfully just as easy to do right.
Is Internal Wall Insulation Worth Installing?
Why install internal wall insulation? Discover the pros and cons and how it can improve the health of you and your home while saving you money.
Insulating an Old House - The Right Way
Insulating an old house sounds easy but if done wrong you could cause damage to your home.
Problems With Cavity Wall Insulation
Understanding the problems with cavity wall insulation is essential before you consider retrofitting cavity insulation.
Is Spray Foam Insulation Any Good?
Is spray foam insulation really that much better than traditional insulations and what are the advantages and disadvantages?


Recent Articles
-
How to Increase Your EPC Rating
Apr 24, 24 11:33 AM
 Learning how to increase your EPC rating is simpler and probably less expensive than you think- find out how here.
 -
Energy Efficient Home Design - What's Involved
Mar 26, 24 01:02 PM
 Energy efficient home design doesn’t just happen, you need to apply these simple principles as soon as you start thinking about either building or renovating your new eco-home.

New! Comments
Have your say about what you just read! Leave me a comment in the box below.